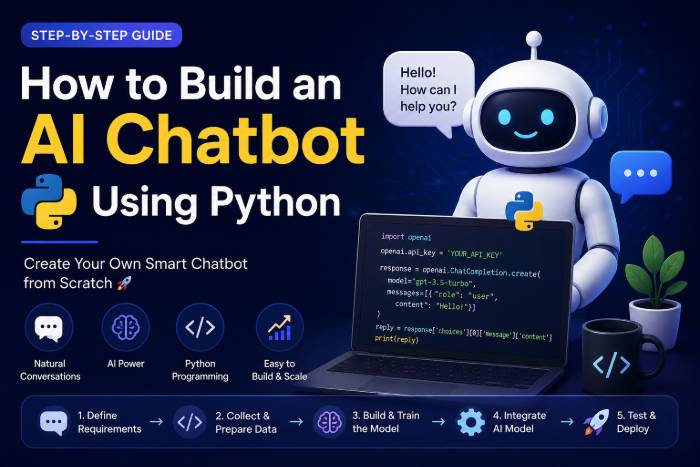
How to Build an AI Chatbot Using Python?
AI chatbots have changed from simple rule-based programs to smart applications that can understand questions, create natural-sounding answers, summarise information, help customers, and support business tasks. The good news is you do not need to build a full artificial intelligence system from scratch. Using Python, an AI API, and basic programming knowledge, you can build a working chatbot that takes user questions and gives smart answers. This makes Python a great choice for students, developers, entrepreneurs, and anyone wanting to learn AI development with Python.
Think of an AI chatbot like a restaurant. Python is the kitchen that manages what happens behind the scenes; the AI model is the chef who understands the customer’s request, and your application is the waiter who carries the request and response between the customer and the kitchen. Once you understand these three parts, building a basic chatbot feels much easier. In this guide, you will learn how to build an AI chatbot using Python, from setting up your work environment to connecting an AI model and making a simple chat interface.
Table of Contents
What Is an AI Chatbot?
An AI chatbot is a software program made to talk with users using everyday language. Traditional chatbots usually rely on set rules, keywords, buttons, or decision paths. Modern AI chatbots can understand the meaning behind a question and create answers on the spot, making conversations feel much more natural.
A Python chatbot usually has several parts. The Python program gets the user’s message, sends it to an AI model through an API, gets the reply, and shows that reply to the user. You can then add features like remembering past conversations, databases, login systems, web pages, document search, voice options, or tools for specific business needs.
How Python Powers AI Chatbots
Python is popular in artificial intelligence because its code is fairly easy to understand and it has many ready-made tools for machine learning, data handling, web development, and automation. A developer can use Python to manage the whole chatbot process without having to build every part of an AI system by hand.
For example, Python can get a question like “What courses do you offer?”, send it to an AI model, handle the reply, and show the answer. You can then add your own business details so the chatbot becomes more helpful for a specific use. This is how a simple chatbot can grow into a useful AI-powered business helper.
Why Build a Chatbot with Python?
There are several reasons Python is a good choice for building chatbots. First, the language is fairly easy for beginners, making it good for people learning programming and AI together. Second, Python works with a large collection of tools and frameworks, letting developers grow from a small test to a much bigger real application.
Another big advantage is flexibility. You can build a chatbot for customer support, education, finding new customers, helping employees, online shopping, appointment help, or finding content. You can also link your chatbot to databases and outside services, letting it do useful jobs instead of just answering questions.
What You Need Before Building a Chatbot
Before writing the chatbot, you need a few basic things. You should have Python installed on your computer, a code editor like VS Code or another programming tool, an AI API account, and basic knowledge of Python variables, functions, loops, and if-else statements.
It is also a good idea to create a separate virtual environment for the project. Python’s official guide suggests virtual environments to keep project tools separate. This stops packages installed for one project from causing problems with another project.
Python, API Access, and Development Environment
Create a project folder such as python-ai-chatbot. Open your terminal inside that folder and create a virtual environment:
python -m venv .venv
Activate it, depending on your operating system. On macOS or Linux, you can use:
source .venv/bin/activate
On Windows, you can use:
.venv\Scripts\activate
Using a virtual environment keeps your chatbot’s tools separate from other Python projects.
Step 1 — Set Up a Python Project
Once your environment is ready, create a Python file such as:
chatbot.py
Your project can later include extra files for settings, user screens, database links, and chatbot code. But for a beginner project, starting with one Python file keeps learning simple.
The goal at this stage is not to build a complex app. Instead, focus on understanding the basic flow: user input → Python → AI model → Python → chatbot reply. Once that process is clear, you can slowly add more advanced features.
Step 2 — Install the Required Python Package
For an API-based chatbot, install the relevant Python SDK in your virtual environment. For example:
pip install openai
Always install packages inside the project’s virtual environment instead of the global Python setup. This makes the project easier to copy and manage.
You can also make a requirements.txt file later so another developer can easily install the project’s needed packages. As your chatbot gets more advanced, managing these packages becomes more important.
Step 3 — Connect Your Chatbot to an AI Model
The next step is linking Python to an AI model. An API works as the communication link between your app and the AI service. Your Python program sends the user’s message to the API, and the API sends back the model’s reply.
The most important security rule is simple: never put your API key directly inside code that others can see. Instead, keep sensitive information in environment variables or a safe secrets manager.
Store Your API Key Securely
On macOS or Linux, an environment variable can be configured from the terminal:
export OPENAI_API_KEY=”your_api_key_here”
Your application can then access the credential without placing the secret directly inside the source code.
This approach becomes especially important when you upload a project to GitHub or deploy it to a cloud server. Accidentally exposing an API key can allow unauthorised users to consume your account’s API resources.
Step 4 — Write the Basic Chatbot Code
Once the SDK and API key are configured, you can create a simple chatbot. A basic implementation can look like this:
from openai import OpenAI
client = OpenAI()
while True:
user_message = input(“You: “)
if user_message.lower() == “exit”:
print(“Chatbot: Goodbye!”)
break
response = client.responsescreate(
model=”gpt-5″,
input=user_message
)
print(“Chatbot:”, response.output_text)
The program waits for the user to enter a message. Python then sends that message to the AI model and prints the generated response. The loop continues until the user types exit.
This is a very small application, but it demonstrates the foundation of a real AI chatbot. You can later replace the terminal interface with a web page, mobile application, WhatsApp-style interface, or business dashboard.
Step 5 — Add Conversation History
A chatbot becomes much more useful when it can understand the context of a conversation. Imagine asking, “What is Python?” and then following up with, “What can I build with it?” A useful conversational application needs a way to preserve relevant context.
Conversation history can be stored in Python data structures, a database, or through supported conversation/state mechanisms depending on the architecture you choose. For a beginner project, you can start by maintaining a list of previous user and assistant messages.
Conceptually, the process becomes:
User message
↓
Conversation history
↓
AI model
↓
Generated response
↓
Updated conversation history
This simple change transforms the application from a question-answer tool into a more conversational assistant.
Step 6 — Test and Improve Your Chatbot
Building the first working version is only the beginning. The next stage is testing. Ask your chatbot different types of questions and check whether it provides useful, relevant, and consistent answers. Try short questions, long questions, ambiguous questions, incorrect inputs, and questions outside the chatbot’s intended purpose.
You should also think about the chatbot’s personality and boundaries. If you are building a customer-support chatbot, for example, you might instruct it to remain professional, answer questions about your services, avoid inventing information, and direct users to a human representative when necessary.
As the project grows, you can add features such as website integration, document search, databases, authentication, analytics, voice input, multilingual support, function calling, and automated workflows. Modern AI APIs can also be extended with tools and external data, making it possible to build applications that do much more than generate text.
Conclusion
Learning how to build an AI chatbot using Python is an excellent practical way to understand artificial intelligence, APIs, programming, and automation. You can begin with a surprisingly small amount of Python code: accept user input, send it to an AI model, receive the response, and display it. From there, you can gradually add conversation history, a web interface, databases, business knowledge, document retrieval, and automation.
The most important lesson is not to make your first chatbot unnecessarily complicated. Build a small working version first, understand every component, test it with real questions, and then add features one at a time. Once you understand this foundation, you can move toward more advanced AI chatbot development projects using Python and eventually create intelligent applications for education, customer service, marketing, e-commerce, and business automation.
FAQs
1. Can beginners build an AI chatbot using Python?
Yes. Beginners can build a basic AI chatbot with fundamental Python knowledge and an AI API. You do not need to understand advanced machine learning mathematics to create an API-powered chatbot.
2. How much Python is required to build an AI chatbot?
Basic knowledge of variables, functions, loops, conditions, strings, lists, and importing libraries is enough to start. Advanced Python becomes useful as the chatbot grows into a larger application.
3. Can I create a chatbot without training my own AI model?
Yes. API-based development lets you use an existing AI model instead of training one from scratch. This significantly reduces the technical complexity involved in creating a chatbot.
4. Can a Python chatbot be connected to a website?
Yes. You can connect Python chatbot logic to a web application using frameworks and backend technologies. You can then create a user-friendly chat interface through which website visitors interact with the AI assistant.
5. What can I build after learning AI chatbot development?
You can progress from simple chatbots to AI customer-support assistants, educational tutors, lead-generation bots, document-based assistants, internal business assistants, AI agents, and automation systems. The key is to start with a small project and gradually introduce more advanced capabilities.
Read Also : Why Choose Python for Data Science?